安装并配置LDAP Server
apt-get update && apt-get -y install slapd ldap-utils
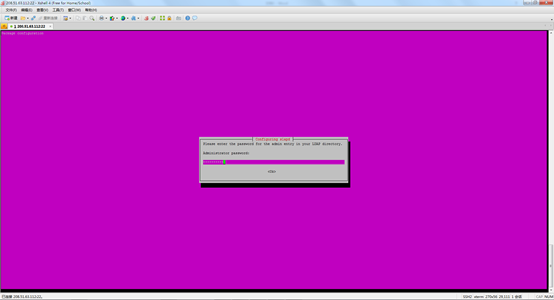
输入LDAP Server的管理员密码(共两次):
重新配置LDAP:
dpkg-reconfigure slapd
Omit OpenLDAP server configuration? : no
DNS domain name: domain.com
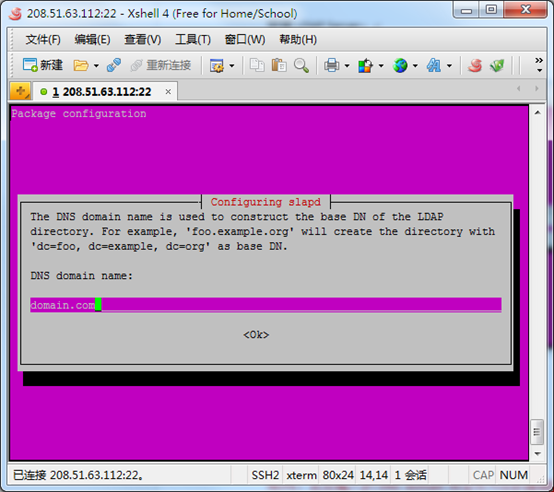
NOTE:此处输入的DNS domain将会作为你的基础搜索区分名称(Base DN)。以”.”为分割符,每个”.”都是一个dc。
举个例子:你输入了domain.com,那么你的Base DN就是dc=domain,dc=com,如果输入了hello.world.com,那么你的Base DN就是dc=hello,dc=world,dc=com。
Organization name: domain.com
Administrator password:
NOTE:此处输入的管理员密码将会覆盖安装时输入的密码。
Database backend to use: HDB
Do you want the database to be removed when slapd is purged?: No
Move old database?: Yes
Allow LDAPv2 protocol?: No
安装并配置完毕后,会自动创建管理员账号(Bind DN),默认为cn=admin,你的Base DN。
添加Organizational Units(下文简称OU)
此处以分别使用CLI模式添加名称分别为users与groups的OU。
保存以下内容到一个文件,例如usersandgroups.ldif:
|
1 2 3 4 5 6 7 8 9 10 11 |
# groups dn: ou=groups,dc=domain,dc=com objectClass: organizationalUnit objectClass: top ou: groups # users dn: ou=users,dc=domain,dc=com objectClass: organizationalUnit objectClass: top ou: users |
NOTE:dn为此Organizational Units的区分名,简单理解成路径,只不过这个路径是从你要找的文件名开始。例如这里的dn: ou=groups,dc=domain,dc=com,则代表groups这个在dc=domain,dc=com这个Base DN的中。再举一个例子:dn: ou=second,ou=first,dc=domain,dc=com,代表second这个OU位于dc=domain,dc=com这个Base DN的first OU中。
使用ldapadd添加:
ldapadd -D “cn=admin,dc=domain,dc=com” -xw管理员密码 -f文件名
NOTE:-D后面接的是你的管理员账号。
看到类似提示:
adding new entry “ou=groups,dc=domain,dc=com”
adding new entry “ou=users,dc=domain,dc=com”
则代表添加成功。
可以使用ldapsearch查看:
ldapsearch -x -b “你的Base DN”
添加用户与用户组的记录
此处分别使用CLI添加类型为posixGroup的用户组与posixAccount的用户。
保存以下内容到文件,例如newuserandgroup.ldif(请自行修改dn):
|
1 2 3 4 5 6 7 8 9 10 11 12 13 14 15 16 17 18 19 20 21 22 |
# newuser, dn: cn=newuser,ou=groups,dc=domain,dc=com cn: newuser gidNumber: 10000 objectclass: posixGroup objectclass: top memberUid: newuser # newuser dn: cn=newuser,ou=users,dc=domain,dc=com cn: newuser givenName: newuser sn: newuser objectclass: inetOrgPerson objectclass: posixAccount objectclass: top gidNumber: 10000 homeDirectory: /home/newuser loginShell: /bin/bash uidNumber: 10000 uid: newuser userPassword: newuser |
NOTE:有关dn的,前文已做解释,此处不说。cn是该记录在LDAP中的名称,gidNumber是用户组id,memberUid是用户组的名称,givenName是名字,sn是姓,gidNumber是用户要加入的用户组的id,homeDirectory是用户的家目录,loginShell是用户登录入系统时使用的Shell,uidNumber是用户的uid,uid是用户的用户名,userPassword是用户的密码。
同样的,使用ldapadd添加记录:
ldapadd -D “你的Base DN” -xw管理员密码 -f文件名
Linux使用LDAP作登录验证
安装验证使用的PAM模块,nss模块,以及nscd:
apt-get -y install libnss-ldap libpam-ldap nscd
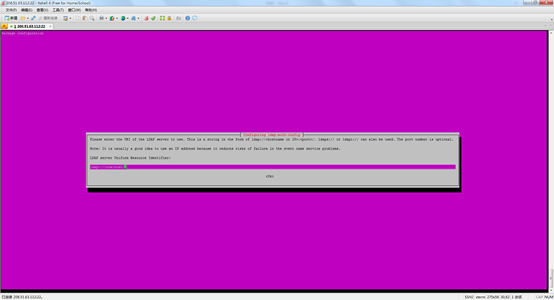
LDAP server Uniform Resource Identifier: ldap://localhost/
NOTE: 一定要把ldapi:///改成ldap://,再输入LDAP Server的IP。
Distinguished name of the search base: dc=domain,dc=com
NOTE:此处输入你的Base DN。
LDAP version to use: 3
Make local root Database admin: Yes
Does the LDAP database require login?: No
LDAP account for root: cn=admin,dc=domain,dc=com
NOTE:此处输入你的Bind DN。
LDAP root account password:
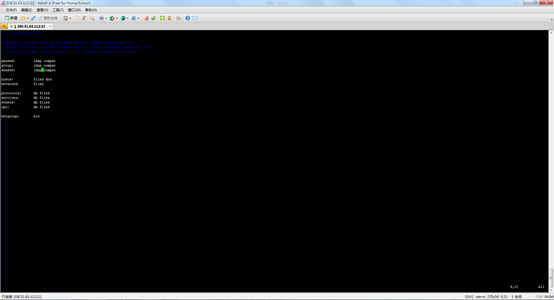
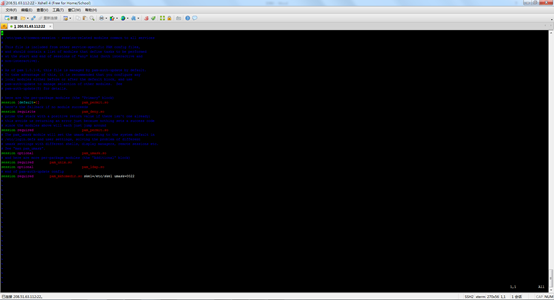
修改/etc/nsswitch.conf文件,在passwd,group,shadow开头的三行末尾的compat前加入ldap,并以空格与compat分开:
修改/etc/pam.d/common-session文件,在末尾加入此行:
|
1 |
session required pam_mkhomedir.so skel=/etc/skel umask=0022 |
重启nscd:
service nscd restart
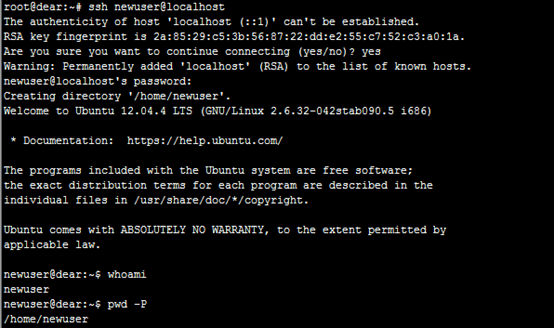
最后使用已在LDAP Server添加的账号记录登录此系统:
ssh newuser@localhost
Freeradius使用LDAP作验证
此处将会启用Freeradius的LDAP模块。
NOTE:开始下面步骤前,建议你使用http://soft.yzs.me/freeradius.sh安装FreeRadius Server
首先安装freeradius-ldap:
apt-get -y install freeradius-ldap
编辑/etc/freeradius/modules/ldap文件,把server等于号后面的内容改为你的LDAP Server IP,去掉identity前面的”#”,把等于号后面的内容改为你的Bind DN,去掉password前面的”#”,把等于号后面的内容改为你的LDAP Server的管理员密码,把basedn等于号后面的内容更改为你的Base DN,最后去掉password_attribute开头的”#”。
修改完毕后的内容应该如下(已去除被注释的行):
|
1 2 3 4 5 6 7 8 9 10 11 12 13 14 15 16 17 |
ldap { server = "localhost" identity = "cn=admin,dc=domain,dc=com" password = password basedn = "dc=domain,dc=com" filter = "(uid=%{%{Stripped-User-Name}:-%{User-Name}})" ldap_connections_number = 5 timeout = 4 timelimit = 3 net_timeout = 1 tls { start_tls = no } dictionary_mapping = ${confdir}/ldap.attrmap password_attribute = userPassword edir_account_policy_check = no } |
修改/etc/freeradius/sites-available/default文件。
在
authorize {
此处内容省略
}
的”{“与”}”之间加入一行:ldap。
在
authenticate {
此处内容省略
}
的”{“与”}”之间加入下面内容:
Auth-Type LDAP {
ldap
}
如果使用http://soft.yzs.me/freeradius.sh安装FreeRadius Server,则修改完毕后/etc/freeradius/sites-available/default文件的内容一般如下:
|
1 2 3 4 5 6 7 8 9 10 11 12 13 14 15 16 17 18 19 20 21 22 23 24 25 26 27 28 29 30 31 32 33 34 35 36 37 38 39 40 41 42 43 44 45 46 47 48 49 50 51 52 53 54 55 56 57 58 59 60 61 62 63 64 65 66 67 |
authorize { preprocess chap mschap digest suffix eap { ok = return } files sql ldap expiration logintime pap hourlytrafficcounter dailytrafficcounter monthlytrafficcounter } authenticate { Auth-Type PAP { pap } Auth-Type CHAP { chap } Auth-Type MS-CHAP { mschap } Auth-Type LDAP { ldap } digest unix eap } preacct { preprocess acct_unique suffix files } accounting { detail unix radutmp sql exec attr_filter.accounting_response } session { radutmp sql } post-auth { sql exec Post-Auth-Type REJECT { # log failed authentications in SQL, too. attr_filter.access_reject } } pre-proxy { } post-proxy { eap } |
重启Freeradius:
service freeradius restart
最后使用radtest,对已在LDAP Server添加的用户记录进行测试:
radtest newuser newuser localhost 0 testing123
如果返回的内容有Access-Accept,则代表验证成功:
Sending Access-Request of id 27 to 127.0.0.1 port 1812
User-Name = “newuser”
User-Password = “newuser”
NAS-IP-Address = 208.51.63.112
NAS-Port = 0
rad_recv: Access-Accept packet from host 127.0.0.1 port 1812, id=27, length=20
教程到此完毕,感谢阅读。
QQ:865475185
Email:e@yzs.me
除非另有声明,本文档内容采用知识共享署名-非商业性使用-相同方式共享授权。