从今天开始,LNMPV的网站正式启用,以后新版均在http://www.mke2fs.com发布
LNMPV 0.2 Stable:
昨天发布了LNMPV 0.1测试版,感谢http://imlonghao.com/这个勇敢的小白,试用了我的LNMPV0.1,告知了我很多BUG,经过昨晚的努力,终于解决了。
另外还要感谢单手摘JJ,经过他昨晚的提醒,让我恍然大悟,发现可以一站一POOL来实现PHP以特定的用户身份执行。从而解决跨站问题。
本次更新:
1 )使用sock方式链接PHP-FPM
2 )添加可选的一站点一POOL的功能
3 )修改PHP-FPM的进程上限
4 )修改PHP-FPM的默认执行身份
5 )修复部分过分精简的Debian 6无法安装的问题
many……
使用环境:
CentOS 6 32Bit,CentOS6 64Bit,Ubuntu 12.04 32Bit,Ubuntu 12.04 64Bit,Ubuntu 12.10 32Bit,Ubuntu 12.10 64Bit,Debian 6 32Bit,Debian 6 64Bit
将会安装:
Nginx 1.4.1
PHP5.3(Debian6,Ubuntu12.04,CentOS 6)或PHP5.4(Ubuntu12.10)
MySQL5.5
Varnish3.0.4
Memcached
我们Nginx所包含的模块:
|
1 2 3 4 5 6 7 8 9 10 11 |
STANDARD HTTP MODULES: Core, Access, Auth Basic, Auto Index, Browser, Charset, Empty GIF, FastCGI, Geo, Gzip, Headers, Index, Limit Requests, Limit Zone, Log, Map, Memcached, Proxy, Referer, Rewrite, SCGI, Split Clients, SSI, Upstream, User ID, UWSGI. OPTIONAL HTTP MODULES: Addition, Debug, Embedded Perl, FLV, GeoIP, Gzip Precompression, Image Filter, IPv6, MP4, Random Index, Real IP, Secure Link, SSL, Stub Status, Substitution, WebDAV, XSLT. MAIL MODULES: Mail Core, IMAP, POP3, SMTP, SSL. THIRD PARTY MODULES: Chunkin, Embedded Lua, Fancy Index, HttpHeadersMore, HTTP Substitution Filter, http push, Nginx Development Kit, Upload module, Upload Progress,Limit Req2. |
不知道有没有列全,反正是挺多的了,具体有什么用,怎样用,Nginx WIKI欢迎您……
完美解决PHP跨站问题……
安装耗时:使用Ubuntu/Debian且网络好的大概需要一首背对背拥抱的时间,使用CentOS,甚至地处墙厚的地理位置,服务器配置太低,网速太慢,大概需要一首情歌王(或许更长)的时间……
安装以及使用教程:
没有wget的同志执行这个:
CentOS 6.*:
|
1 |
yum -y install wget |
Ubuntu12.* or Debian 6
|
1 |
apt-get -y install wget |
这里三选一(LNMPV0.1请到下面找):
zip包:
|
1 2 3 |
wget http://soft.yzs.me/lnmpv0.2-stable.zip unzip lnmpv0.2-stable.zip |
tar.gz包:
|
1 2 3 |
wget http://soft.yzs.me/lnmpv0.2-stable.tar.gz tar zxvf lnmpv0.2-stable.tar.gz |
tar.bz2包:
|
1 2 3 |
wget http://soft.yzs.me/lnmpv0.2-stable.tar.bz2 tar xjvf lnmpv0.2-stable.tar.bz2 |
安装:
|
1 |
cd lnmpv0.2-stable |
For CentOS 6.*:
|
1 |
./ctos-lnmpv.sh|tee centos.log |
For Ubuntu 12.*:
|
1 |
./ub-lnmpv.sh|tee ubuntu.log |
For Debian 6:
|
1 |
./deb-lnmpv.sh|tee debian.log |
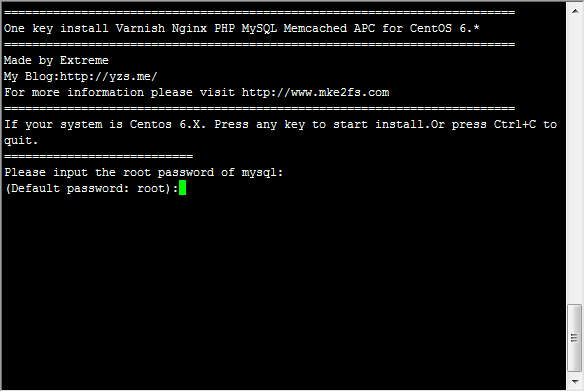
CentOS 6安装时需要输入MySQL密码:
如果回车跳过,则安装后密码为root。
Ubuntu 12.*/Debian6也要(好看多了):
输入两次……
输入完密码,就开始自动安装了!
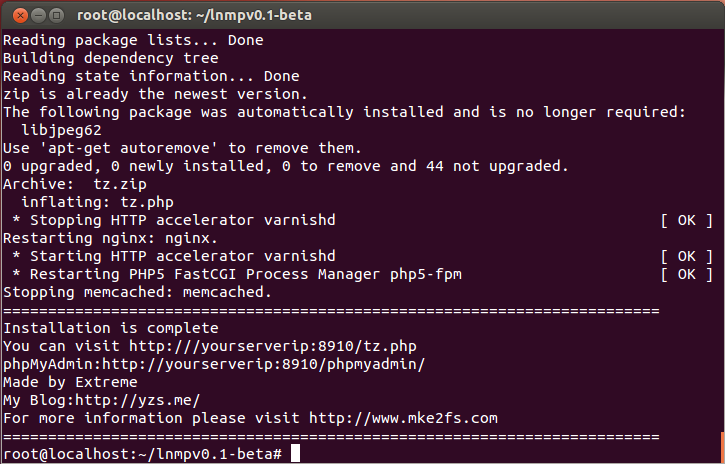
看到如下提示,祝贺你,一切完成:
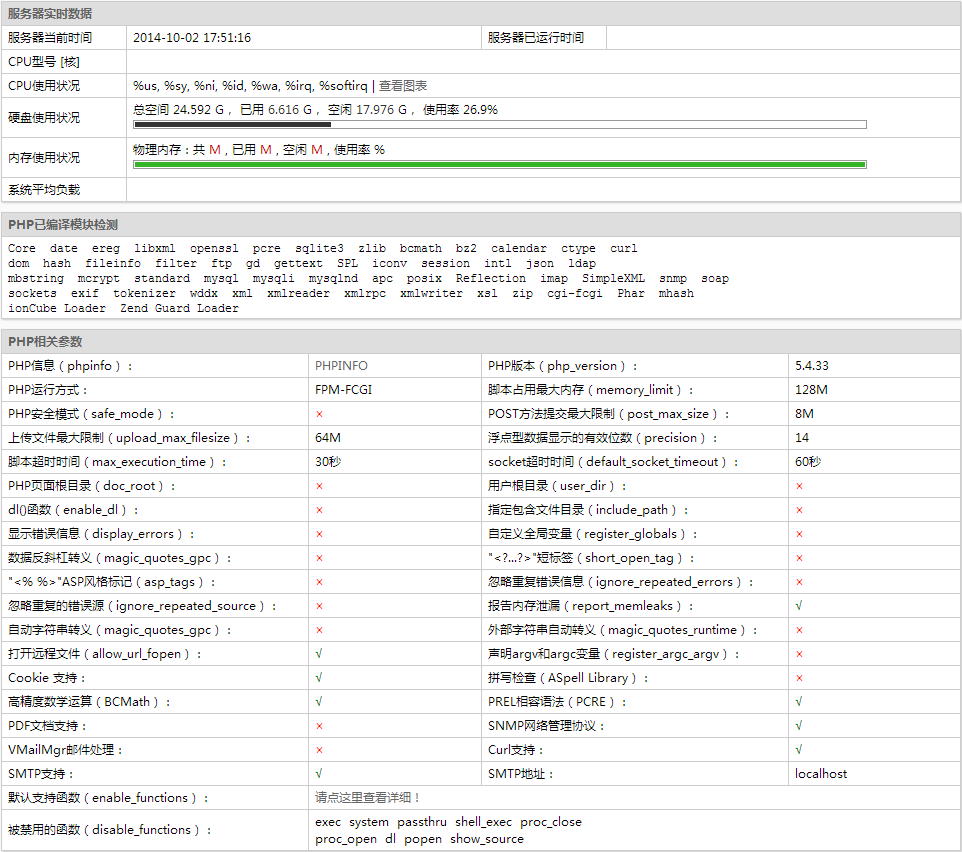
探针地址:http://你服务器的IP:8910/tz.php
phpMyAdmin:http://你服务器的IP:8910/phpmyadmin
添加虚拟主机:
任何地方输入addhost:
|
1 2 3 4 5 6 7 8 9 10 11 12 13 14 15 16 17 18 19 20 21 22 23 24 25 26 27 28 29 30 31 32 33 34 35 36 37 38 39 40 41 42 43 44 45 46 47 48 49 50 |
========================================================================= Add Virtual Host for LNMPV ========================================================================= Made by Extreme My Blog:http://zhensheng.im/ For more information please visit http://www.mke2fs.com ========================================================================= Please input domain,example(yzs.me):360buy.com #这里输入你要绑定的域名(只能一个) =========================== domain=360buy.com =========================== Do you want to add more domain name? (y/n) y #如果该站点还有其他域名,请输入y Type domainname,example(www.yzs.me soft.yzs.me bbs.yzs.me): www.360buy.com #输入该站点的其他域名(可多个,域名直接用空格分开) =========================== domain list=www.360buy.com =========================== Do you want to use a different user for this website? (y/n) y #该站点是否要以不同的用户身份执行PHP(更安全) Type username,example:mywebsite 360buy #输入该站点的PHP执行的用户名(没有的话自动创建,千千万万不能写root!) =========================== your website user is 360buy =========================== Please input the directory for the domain:360buy.com : (Default directory: /var/www/360buy.com): #输入你的网站的根目录(不存在时自动创建,可按回车跳过,默认为/var/www/你的域名) =========================== Virtual Host Directory=/var/www/360buy.com =========================== Press any key to create your virtul host... #此处可反悔,如果有误,可按Ctrl+C退出 Create Virtul Host directory...... set permissions of Virtual Host directory...... useradd: warning: the home directory already exists. Not copying any file from skel directory into it. Restart Nginx...... Restarting nginx: nginx. Restart PHP-FPM.... * Restarting PHP5 FastCGI Process Manager php5-fpm [ OK ] ========================================================================= Add Virtual Host for LNMPV You can add rewrite rules in /etc/nginx/rewrite/360buy.com.conf. ========================================================================= Made by Extreme My Blog:http://zhensheng.im/ For more information please visit http://www.mke2fs.com ========================================================================= |
另外提供一个删除网站的Shell Script:
|
1 |
wget http://soft.yzs.me/lnmpv-deletesites.sh -O /usr/sbin/delsite;chmod +x /usr/sbin/delsite |
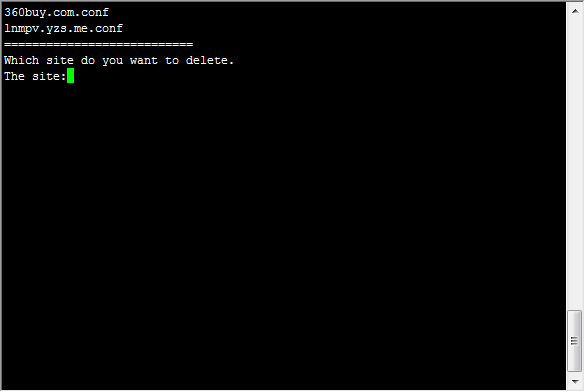
执行完上面的命令后,在任意地方输入”delsite”,可看到如下提示:
此处列出了您所添加的站点的配置文件,假设要删除360buy.com这个网站,就输入360buy.com.conf(不要忘了.conf),按Enter。
确定无误,就按任意键继续,本Shell Script会删除相应的配置文件并且重启相应的服务。
更多问题,请查看FAQ
==================================================
其它版本:
LNMPV0.1-Beta:
经过三天半的夜以继日地紧张劳作,LNMPV0.1-Beta终于问世了……
LNMPV,是Linux,Nginx,MySQL,PHP,Varnish的简称。
自己搭建过环境的都知道,Nginx是“资源节约型”的服务器程序,是个既要马儿跑,又要马儿吃草少的东西,但这仅仅是Nginx……
相信PHP-FPM进程到了上限,要排队访问,甚至502,503的场面,大家也不陌生。
此一键包,就是为了解决该问题而生的……
下载地址:
这里三选一:
zip包:
|
1 2 3 |
wget http://soft.yzs.me/lnmpv0.1-beta.zip unzip lnmpv0.1-beta.zip |
tar.gz包:
|
1 2 3 |
wget http://soft.yzs.me/lnmpv0.1-beta.tar.gz tar zxvf lnmpv0.1-beta.tar.gz |
tar.bz2包:
|
1 2 3 |
wget http://soft.yzs.me/lnmpv0.1-beta.tar.bz2 tar xjvf lnmpv0.1-beta.tar.bz2 |
FAQ
1 ) WordPress安装插件/主题时提示输入FTP账号密码:
如果添加虚拟主机时没有使用以不同用户身份运行PHP,就执行:
|
1 |
chown -R php-fpm:php-fpm 你的网站目录 |
如果添加虚拟主机时对该站点使用了不同用户身份运行PHP,则执行:
|
1 |
chown -R 添加虚拟主机时所填写的用户名:php-fpm 你的网站目录 |
2 )关于Rewrite(重写),就是伪静态规则,可以加入到:
|
1 |
/etc/nginx/rewrite/你的域名.conf |
里面,然后重启nginx:
|
1 |
service nginx restart |
3 ) 关于8910端口的页面:
本人建议大家更改该页面的端口:
|
1 |
vim /etc/nginx/sites-available/000-manager.conf |
把listen 8910;改成其他不易被猜到的端口。
同时可使用密码控制访问:
|
1 |
wget http://soft.yzs.me/set8910passwd.sh;sh set8910passwd.sh |
执行后访问:8910的默认用户名是:admin,密码是:passwd
4 ) 关于FTP:
木有!用SFTP吧,账号是root,密码是你root账号的密码……
关于控制面板:
木有!!!玩Linux,控制台就是你的控制面板!
有待添加……
如果安装失败,或者安装过程出现些什么错误,请把安装目录下的log文件通过邮件方式发到我的邮箱:e”at”yzs.me
有什么好的建议,或者反映BUG的,也可以通过邮件联系我。
下个版本打算加入可自定义每个站点的缓存时间的功能。:8910的首页开发中……


Comments are closed.